
How do I Add or Import Students to a Class?
Christ in Us Administrators and instructors can add students to a class individually or import a class roster file. You will need to set up instructors, students, and classes before completing the steps below.
Your Christ In Us administrator can turn off the functionality described below for instructor users. If you cannot complete the task as an instructor, please check with your Christ In Us administrator.
Manage Classes Page
|

|
|
 |
|
|
|

|
|

|
Class Roster Import File Template
|
 |
The template file is a Comma Separated Values (CSV) file. A CSV is a plain text file with a list of data. Use Excel, Google Docs Spreadsheet, Numbers (mac application), or other similar software to edit the CSV. |

|
|
|

Creating the Class Roster Import File
Most import file columns are required. To avoid errors, do not alter the columns' order or leave out information in a required column. The first two rows are example data.
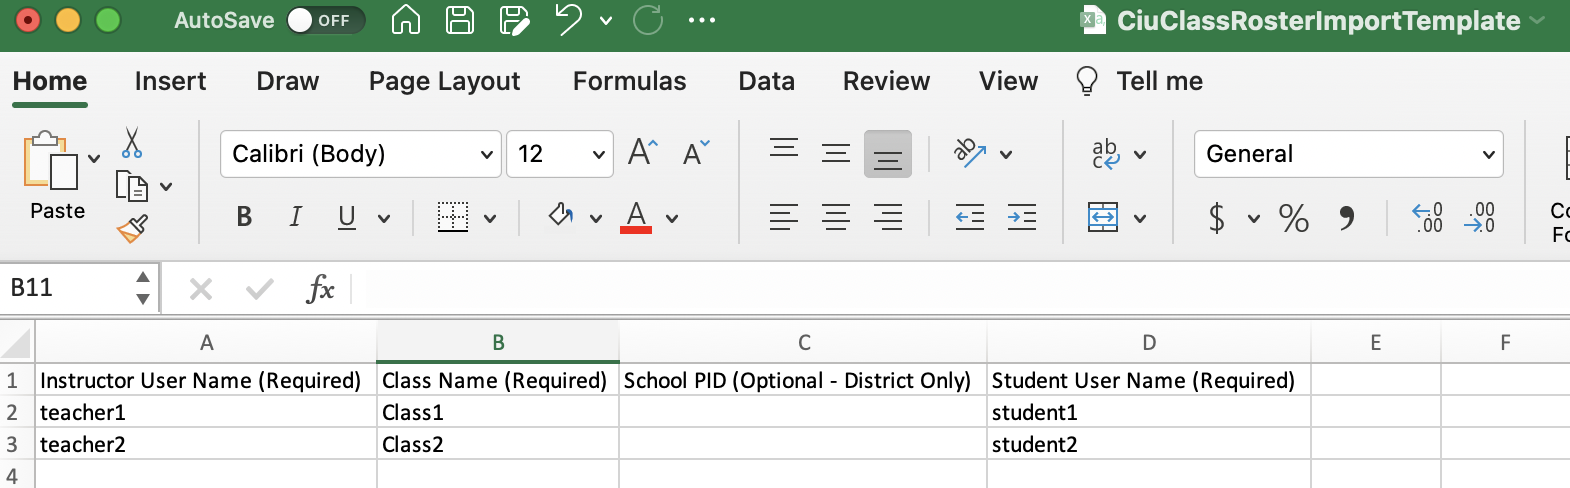
| Column Letter | Column Label | Description |
| A | Instructor User Name (Required) | The instructor's username entered in the file must match the username loaded into the system. |
| B | Class Name (Required) | The class needs to exist for the specified instructor in Column A. |
| C | School PID (Optional - District Only) | Leave this field blank. |
| D | Student User Name (Required) | The student username is the one you set up when you created your student accounts. |
Saving the Class Roster Import File
- Please remember to remove the example rows before saving your Class Roster Import File.
- Save your Class Roster Import File by selecting "File > Save As..."
- On the File Format section of the Save As screen, set it to Comma Separated Values (.csv).
Christ in Us will only import Comma Separated Values (.csv) file formats. Please be sure to select the correct file format, Comma Separated Values (.csv), when saving your file.
Uploading the Class Roster Import File
- Return to the Import Class Rosters page in Christ in Us.
- Click the "Choose File" button and find the CSV file you created.
- Click the Continue button.
Christ in Us will check the import file for errors. The example below shows the instructor's username does not exist. Please notice the scroll bar above the columns if you need information on an error. If you receive an error on any rows, they will not import, and you should fix them in the file and upload the new saved CSV.
When the file is error-free, click the Import Roster button.
